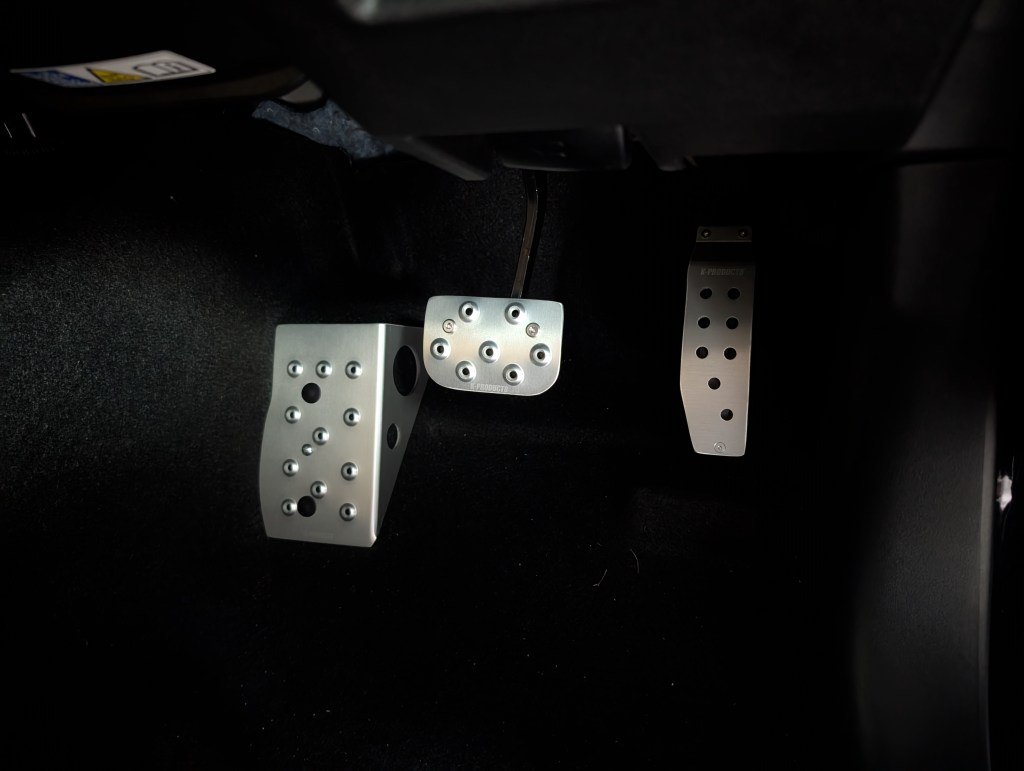
アルミペダル、ブレーキセット / Aluminum Pedal and Brake Set
アルミフットレスト / Aluminum footrest
クルマを新調したら必ずと言っていいほど過去のクルマにも付けてきたアルミのペダル、ブレーキ。クルマに乗る際に最初に目に入るし、汚れやすい箇所でもあるので、できるだけつけたい。ジムニーノマド用として選んだのはk-productsの商品。見た目良さそう。取り付けも自分でできそう。ということで選びました。
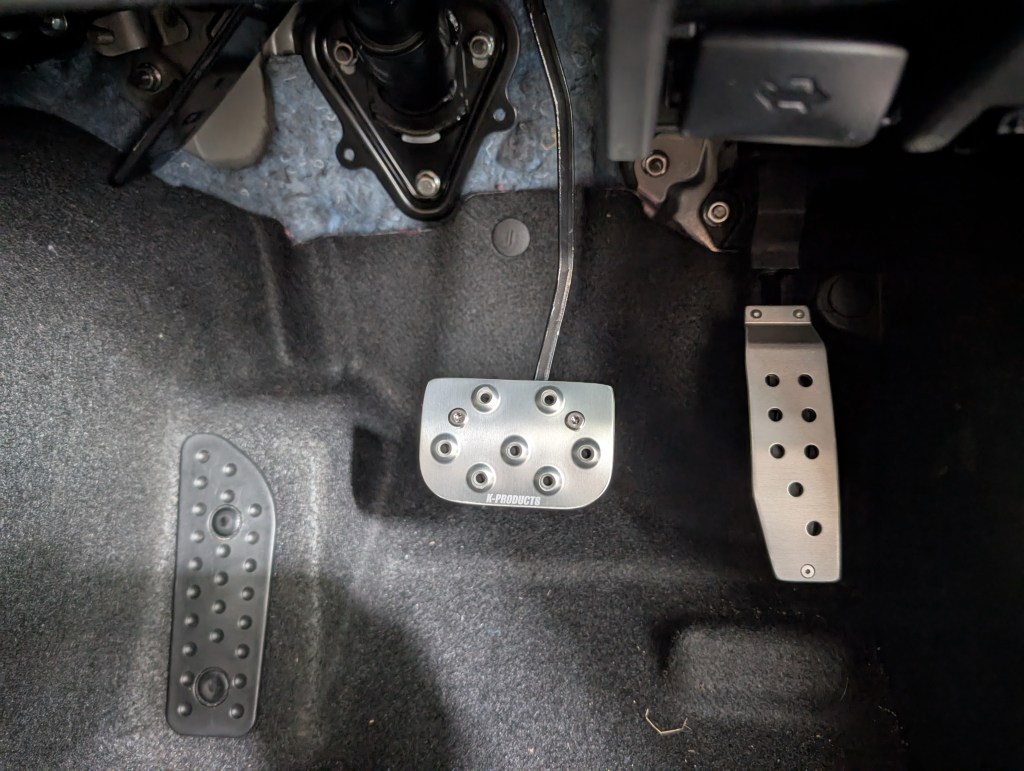
結論、アクセルとブレーキは付けられたが、フットレストは付けられませんでした。まずはブレーキ。これは一番簡単でした。ナットを裏から掴んで六角で締めて完了。
Whenever I get a new car, I almost always install aluminum pedals and brake pedals—the kind I’ve used on my previous cars. They’re the first thing you see when you get in the car, and they tend to get dirty easily, so I want to install them whenever possible. For my Jimny Nomad, I chose a product from K-Products. It looks good, and it seems like I can install it myself. That’s why I chose it.
The bottom line: I managed to install the accelerator and brake pedals, but I couldn’t install the footrest. First up was the brake pedal. This was the easiest part. I just grabbed the nut from the back and tightened it with a hex wrench—done.

続いてアクセル。同じく3点止めですが、右腕のナットを締めるにあたり、ナットを掴むスペースがほとんどない!
色々試行錯誤して、100均に行き、先端がカーブしているラジオペンチを買い、これでつかもうとしました。
何十分もチャレンジしてやっと締められました。おそらく、プロはアクセルを外して作業するのかなと思いました。素人はそんなこと怖くてできないので、せめてもう少しボルトの横にペンチが入るスペースがあったらなと思いました。
Next up was the accelerator. It’s also secured at three points, but when it came to tightening the nut on the right side, there was almost no room to grip it!
After trying various methods, I went to a dollar store, bought a pair of needle-nose pliers with curved tips, and tried to use those.
It took me several tens of minutes of trying before I finally managed to tighten it. I figured professionals probably remove the accelerator to do the work. As an amateur, I’m too scared to do that, so I really wish there had been just a little more space next to the bolt to fit the pliers.
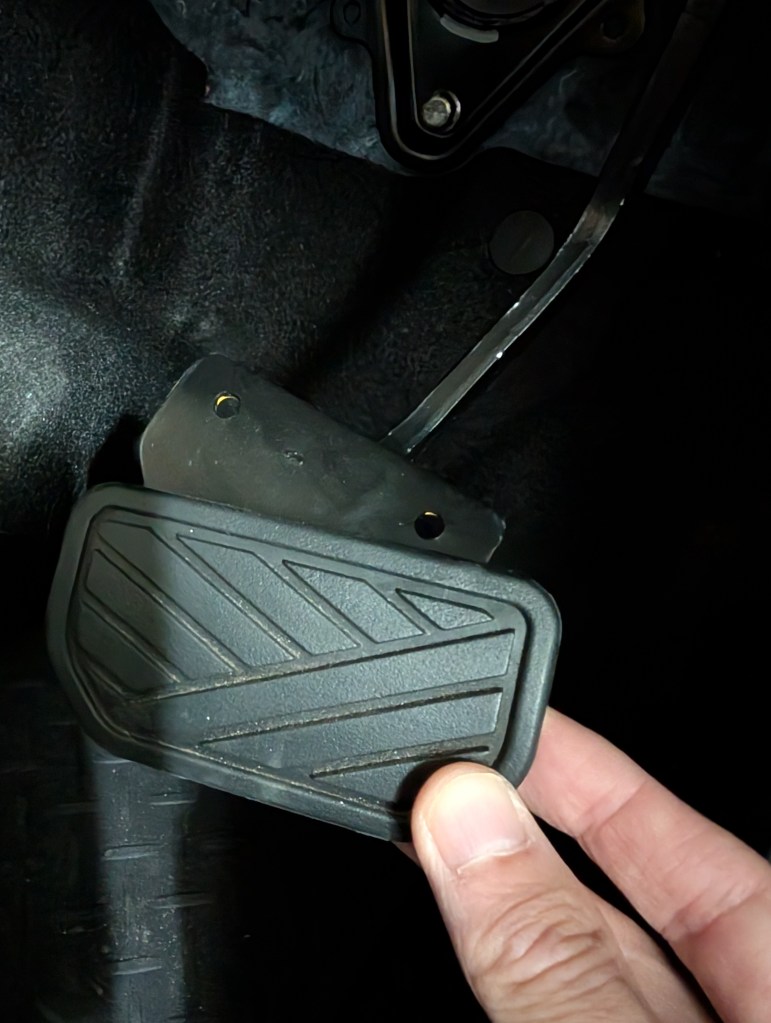
最後にフットレスト。これが一番簡単だと思っていたのですが、始めてみると、まず純正のクリップを外すのに苦戦して、先ほどのラジオペンチで外しました。
取り付けは説明書を見ると、ラバーのボルト受けみたいなのを先に穴に入れてボルトを上からねじ込むのですが、なかなか入らない。
フットレストの裏側が見えないため、正確な場所がつかめず、1時間近く格闘しているうちに、なぜかラバーのボルト受けがなくなってしまいました。。
それでボルト締めは諦め、純正クリップのみで止めようとしてもこれもイマイチ正確な場所に入らず、クリップも少し折れてきて、うまくいきませんでした。。
で、アクセル、ブレーキと合わせトータル3時間くらい格闘してギブしました。
このフットレストは他のメーカーのものよりビジュアルが良かったので購入しましたが、取り付けられないなんて。。
純正のものを外して付ける。これだけのことなのに実際やってみると僕にとってはハードルだらけでした。
フットレスト本体と車体のフットレスト部分の形も微妙に合わないというか正確な取り付け位置が分かりにくく。
何度もあきらめかけました。AT車であればアクセル、ブレーキ、フットレストまでコンプリートしたいです。
Finally, the footrest. I thought this would be the easiest part, but when I actually got started, I struggled to remove the original clips and ended up using the needle-nose pliers I mentioned earlier.
According to the manual, installation involves inserting a rubber bolt retainer into the hole first and then screwing the bolt in from above, but it just wouldn’t go in.
Since I couldn’t see the underside of the footrest, I couldn’t pinpoint the exact spot. After wrestling with it for nearly an hour, the rubber bolt retainer somehow disappeared.
So I gave up on tightening the bolt. I tried securing it using only the original clip, but it wouldn’t fit exactly right either, and the clip started to bend a little, so it didn’t work out.
So, between the accelerator, the brake, and this, I spent a total of about three hours struggling with it before I gave up.
I bought this footrest because it looked better than those from other manufacturers, but I can’t believe I couldn’t even install it…
Just removing the stock one and putting this one on. It should have been that simple, but when I actually tried it, it was full of hurdles for me.
The shape of the footrest itself and the footrest area on the bike don’t quite match up, or rather, it’s hard to figure out the exact mounting position.
I almost gave up several times. If I had an automatic transmission bike, I’d want to complete the whole set—accelerator, brake, and footrest.
2日目。フットレスト取り付けに再挑戦しました。
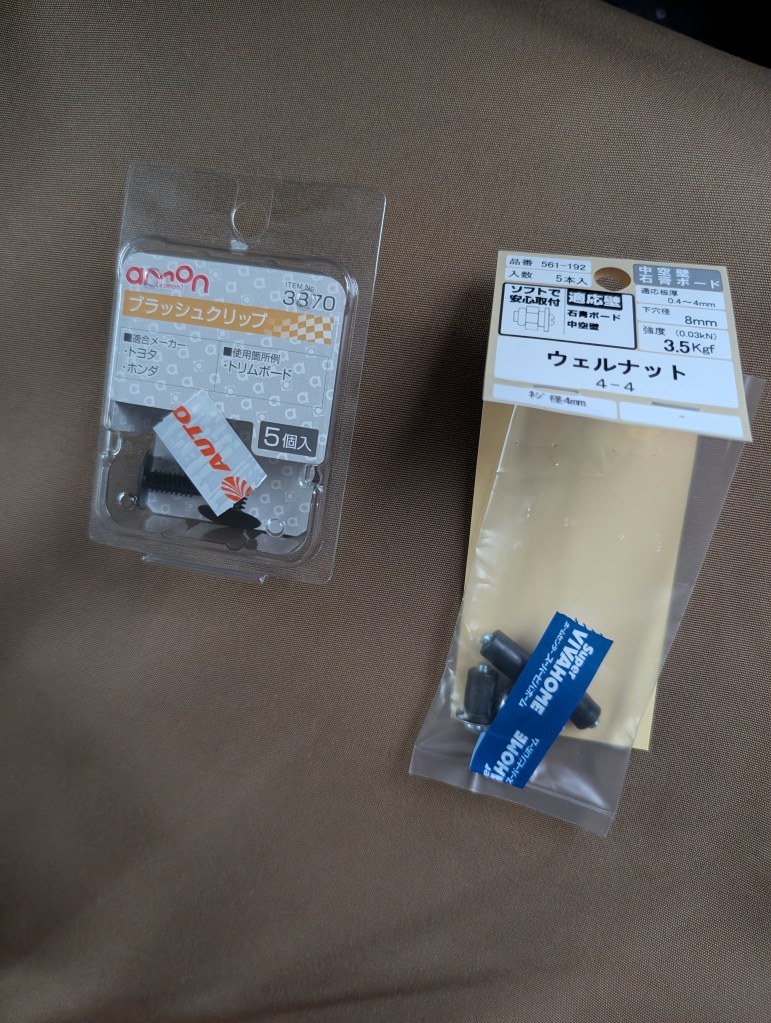
ホームセンターとオートバックスに行って、ウエルナットとブラッシュクリップを買って来ました。
Day 2. I gave installing the footrest another try.
I went to the home improvement store and Autobacs and bought some washers and brush clips.
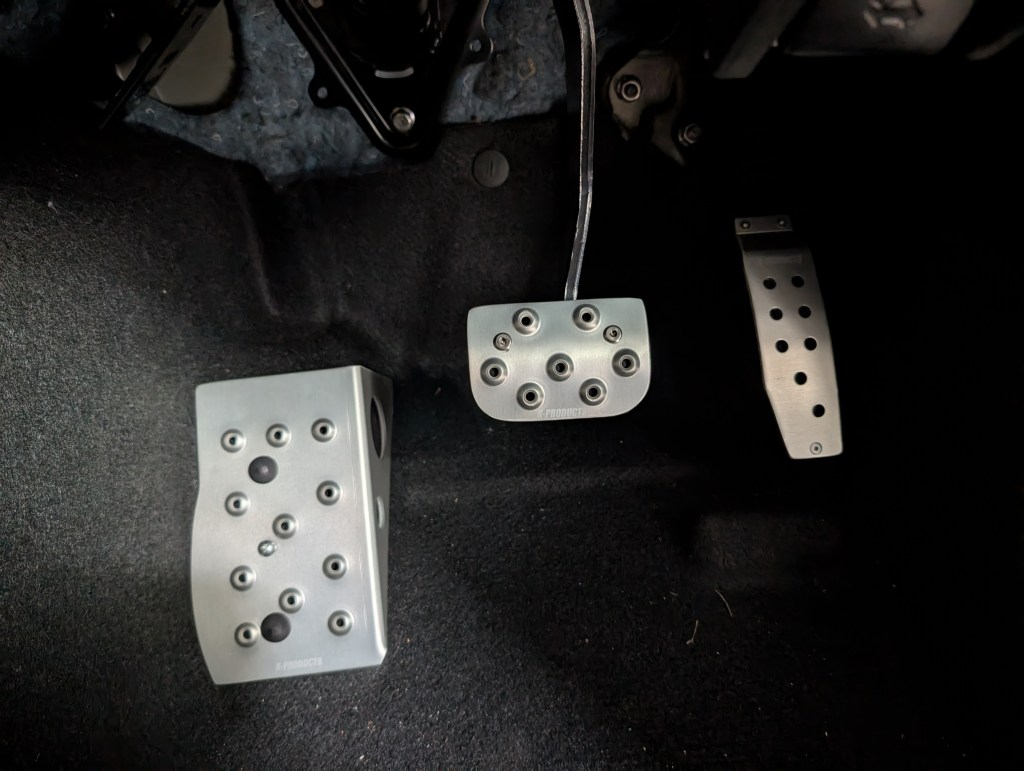
今日は最初に車側にウエルナットを差して、上からフットレストをボルト止めするやり方にしました。フットレストは車体の左側に強く押し付けるようにすると、穴と穴が一致することがわかりました。わかったというか目視できました。このあたりは個体差の誤差もあるかもしれません。
これで、ボルトを締め、クリップを差し込み完了しました。
Today, I decided to start by inserting the washers on the car side first, then bolting the footrest in place from above. I found that if I pressed the footrest firmly against the left side of the car body, the holes lined up perfectly. Well, I could actually see that they lined up. There might be some variation depending on the specific vehicle.
With that, I tightened the bolts, inserted the clips, and finished the job.
作業トータル3.5時間くらいかかかりました。そのほとんどはアクセルの右上のボルト止めと、フットレスト取り付けでした。
クルマのプチカスタムは簡単そうに見えても自分でやるとスムーズにはいかないことのほうが多いです。
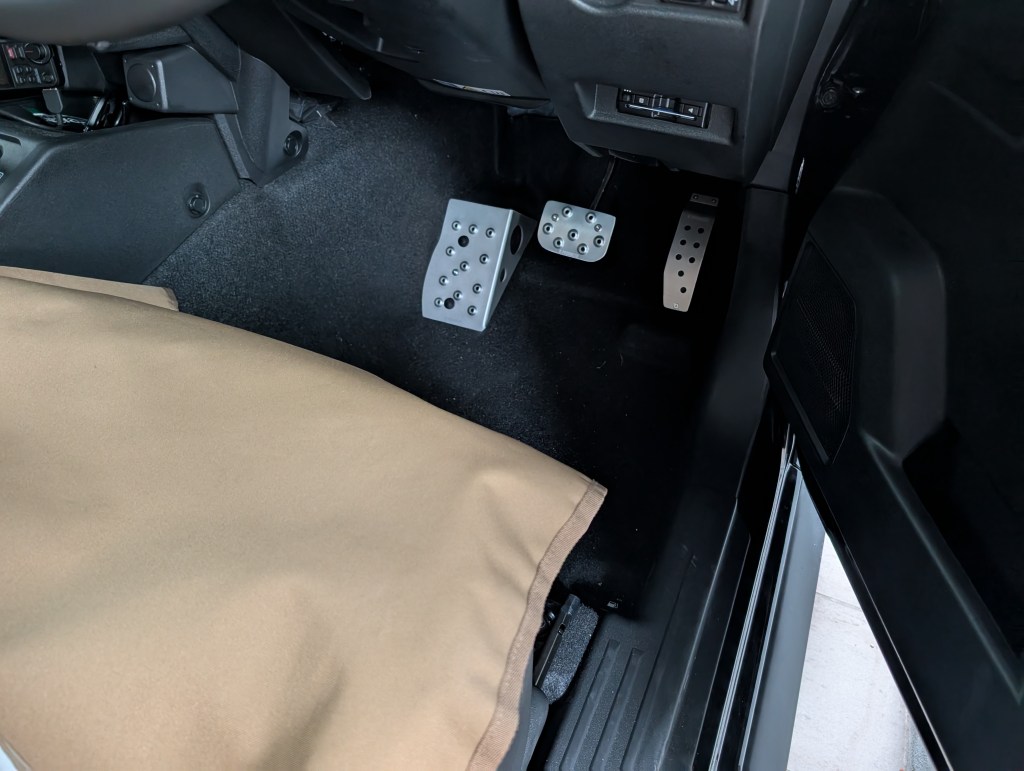
見た目はとても良いです。
The whole job took about 3.5 hours. Most of that time was spent securing the bolt in the upper right corner of the accelerator and installing the footrest.
Even though minor car customizations may look simple, they rarely go smoothly when you try to do them yourself.
It looks great.
アルミペダル、ブレーキセット / Aluminum Pedal and Brake Set
アルミフットレスト / Aluminum footrest

コメントを残す